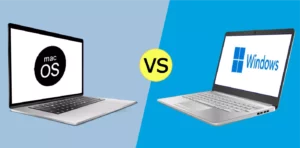
Screenshots are very a convenient resource to collect important data and information. Now, you may not know what you need to do to get the process done on a laptop. For this reason, we explain how to take a screenshot on any laptop, be it Windows or Mac.
Laptops allow you to take screenshots through their keyboards. In the case of Windows, it has a specific key (prt sc), and in Mac you have to perform a keyboard command. In any case, the procedure is very simple and does not take more than a couple of seconds.
Below, we give you all the details you need to take screenshots on any laptop and we also offer tips for further processing.
How to take a screenshot on a Windows laptop?
The procedure for taking a screenshot on a Windows laptop is the same as on a desktop computer. You only have to locate the corresponding key on the keyboard, which can be called Print Screen, PrtScn, or prt sc, depending on the distribution and language of the keyboard.
In most cases, it is located in the upper right area, almost always next to the function keys. It is also possible that it is aligned with the arrow keys and that it has an image of a camera or other symbol that identifies it.
How to use a screenshot in Windows?
There are two ways to use screenshots on a Windows laptop. The first one is the simplest of all, which consists of pressing the key by itself. In this way, a capture of everything that is being displayed on the screen is made.
However, one of the tricks that few people know is that you can also take screenshots only of the application that you are using. To do this, hold down the Alt key and then use the print screen key.
We clarify that any of the two Alt keys on the keyboard, the left or the right, can be used for this procedure.
How to save a screenshot on Windows laptop?
Unfortunately, just by pressing the print screen key, the screenshot is not automatically saved on the computer. Actually, what the operating system does is copy that image to the clipboard, so you will need to paste it into a compatible program.
The easiest option of all is to open the Windows Paint editor, where you can adjust the parameters of the image, its size and use some editing tools. Also, you can save the file with the name you need, as well as save it in different formats.
It is also common for screenshots to be pasted into Word documents, especially when explaining step-by-step procedures. And if you require more advanced editing, you can also consider design programs like Corel Draw or Photoshop.
How to take a screenshot on a Mac?
Unlike Windows, Mac operating systems do not have a specific key used to print the screen. The user will have to use a keyboard shortcut, executing a command of three consecutive keys.
First of all, if you want to take a screenshot of the entire screen, you need to press the Command+Shift+3 keys simultaneously. After this, the screenshot is saved to the desktop as a separate file.
However, if you only need a portion of the screen, use the keyboard command Command+Shift+4. In this way, you will have the possibility to drag the pointer that has the shape of a cross and select the area that you want to capture. When you have selected the portion of the screen you need, stop pressing the keys.
As in the previous case, the screenshot is saved as a separate file on the desktop. At first, it may seem a bit more complicated to capture on Mac than on Windows. However, we have the advantages that a partial capture can be done and that the image is saved as a file, and not only copied to the clipboard.
Best apps to take screenshoots on a laptop
Apart from the traditional options and the native tools of the operating systems, there are also third-party applications that are very practical. Some are used online and others must be downloaded in order to take advantage of them. Either way, they offer extra features, both on Windows and Mac.
In Windows, they come quite well because they are applications with which it is possible to select a specific area of the screen. In the case of Mac, where you can already choose the portion you want, they are very effective tools to edit the captures in place, without having to go to an additional application.
Of course, these little editing tools are available on any OS, although of course, it depends on the application you are going to use.
Among the most common are the following:
Snip & Sketch
Snip & Sketch is a Windows application that allows you to take full or partial screenshots. If you are using Windows 10 and above, you can simply go to the Windows bar search and type “Snip” to find the app.
Alternatively, you can open the app using the Windows+Shift+S keys. Among the available features are the option to capture the entire screen, a particular window, or a portion of the screen.
Apowersoft

Apowersoft is both an online and a desktop application, as it can be used in either of the two ways. It is also a free program, at least in its simplest version. You just have to open its official page and there you will see a guide with which you can take screenshots.
On the other hand, it offers the application download service, as well as programs, both free and paid, to record the screen on video, and not just take screenshots.
DuckCapture

What stands out about this app is that you have the opportunity to record the visible parts of a screen. You only need to slide the mouse to do this, so it is very convenient to capture long documents, images, or web pages.
In the same way, it is very effective thanks to its multi-capture feature, with which you can place multiple screen fragments in a single screenshot. Best of all, it is a completely free application.
LightShot

This is one of the most lightweight, handy, and easy-to-use tools available for Windows, Mac, and as a browser extension. Its main advantage is that you only have to press the print screen key and a cropping area automatically opens.
Just select the portion of the screen you want to capture and use the app’s features. You can edit, add text, point to objects, and even search for similar images on Google.
Snagit
We finish this article with a paid application, available for Windows and Mac laptops. Obviously, it fulfills the function of capturing screen and video, as well as making cuts and adjustments. Now, it is a program that goes much further because it allows you to use graphic elements, blur areas, use arrows and save files in PDF format.
In the same vein, it is ideal for creating large images through screen swipe. Additionally, it is used to record videos with audio to make comments. You can use the 15-day free version in case you want to try the app.
In any case, you have many alternatives to take screenshots on your laptop, so choose the most convenient one for you.
Boost Your Business
Want more clients and sales? Our web development services will optimize your website to convert more visitors into customers.
Get Started Today

